A Free Cloth Hitty Pattern from Tree
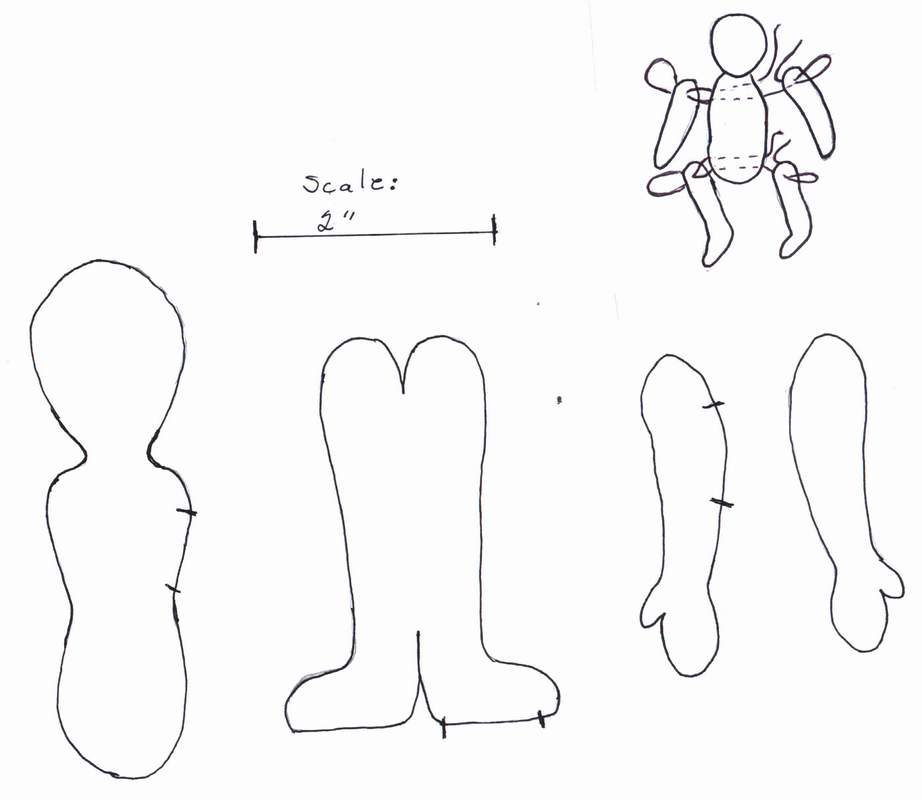
Editor's Note: If the picture doesn't print out to the 2: scale, save
it to your computer, and resize to fit.
-
The pattern lines are the sewing lines.
-
Print the patterns on cardstock.
-
Cut them out and trace around them on your fabric.
I used a quilter's pen that the ink disappears, so I could sew right on
the line. If you use a pencil, you will want to sew just inside the line
so the mark won't show.
-
Altogether, you will need 2 body sections, 2 leg
sections and 4 arms.
-
Cut around the guide, leaving a generous amount
of fabric. Using a backstitch sew around each piece, using small fine stitches,
and leaving a space for turning. I marked the pattern where I left the turning
space.
-
Now, cut the fabric closer to the stitch line, leaving
about 1/4" seam. Sew the seam again, using an overcast stitch, this
doesn't need to be as close as the backstitch, except at the neck, and around
the thumbs.
-
Turn your pieces right-side out, being especially
careful with the thumb.
-
Stuff each piece and sew closed using the ladder
stitch. (I think some people call it the mattress stitch)
-
The diagram with the pattern shows how to make the
joints for the arms and legs.