Polish wooden reborn Hitty Challenge/Swap
© Tutorial created by Melanie Smith, MelzDolz@aol.com 2006
Hittygirls*** For personal use only, do not copy or share this tutorial
with other groups,
boards or clubs without written consent from Melanie Smith melzdolz@aol.com
Not to be sold or re-published without permission.
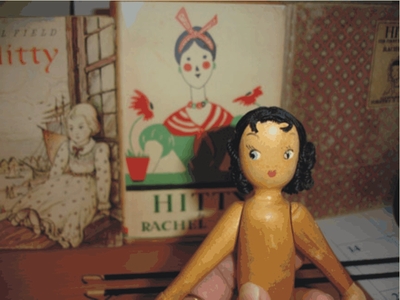
Click Here to See our Finished Reborns!
Disclaimer*** Many of these Polish wooden dolls are adorably dressed and collectible in their own right, so I do not condone destroying a perfectly good doll to make this reborn Hitty, but it is easy to find these dolls with messed up hair, no clothes, broken elastic, etc… and then you are saving a doll and making a new one to love.
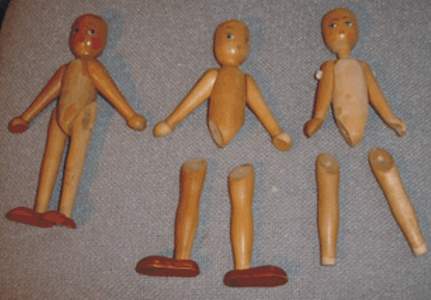
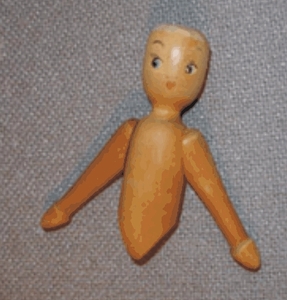
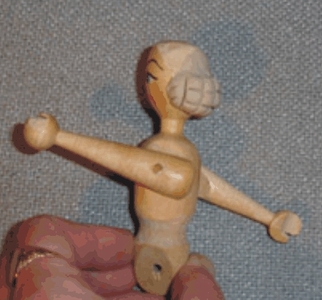
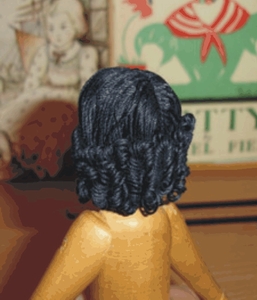
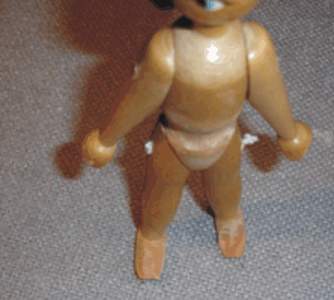
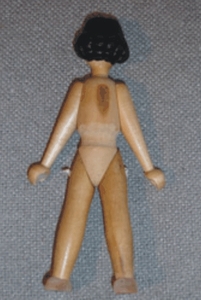
I tried to think of a way for nearly everyone and anyone could remake a doll into Hitty, with little need of power tools and low investment of money. I found several of the inexpensive Polish wooden dolls that I thrown in a box some years ago because they were in need of repair. These Polish wooden dolls can be found at thrift stores, antique shops and eBay for as cheap as $5.00. They are made of sturdy wood that is easy to carve & sand if you choose to, also being strung with elastic makes them easy to take apart and re-assemble. You can either carve hair, mold it from clay or similar product, or make a wig from floss, yarn, mohair or other textile. I made one with molded/sculpted hair using Qwikwood epoxy (wood putty), and I am also made one with black floss hair (See TCV’s tutorial link listed below).
My dolls legs had already fallen off because of
the old elastic breaking, but if they hadn’t I would have cut
elastic to make doll easier to work with while remaking her.
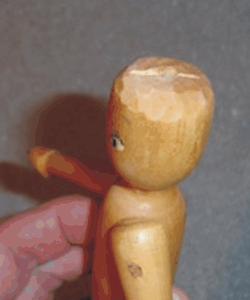
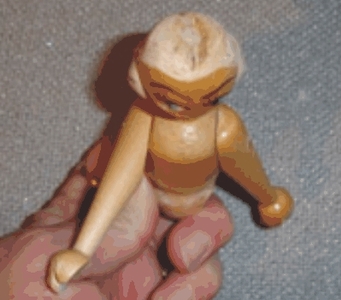
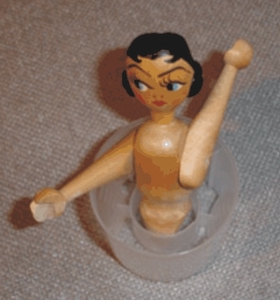
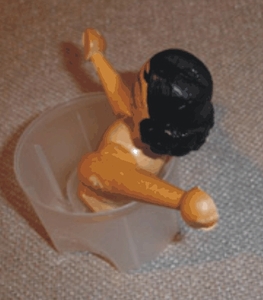
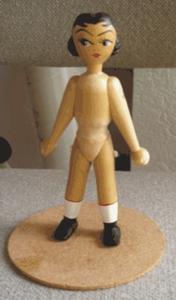
Next I molded Hitty’s curls onto the back of the dolls head, and used a plastic knife to make the eight rows and divided curls in the back. I also used a small amount of the clay (putty) to fill in the hole that is on the top of all the heads on these dolls. For the molded hair doll, I set her aside propped up in a cap from a spray can, so her hair could dry/cure.
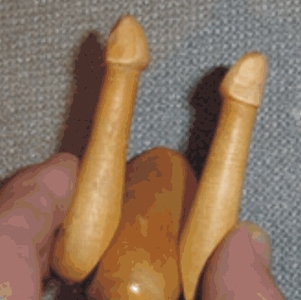
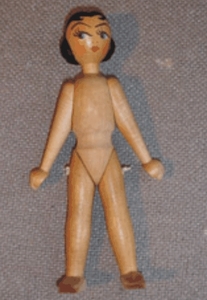
My next step is to either carve down (only if you are comfortable with carving) her feet, or you can just sand them and paint Hitty’s stockings, red garters and black boots. I carved the feet down because on one of the dolls I had mismatched
legs with un-matching feet, so I wanted them to be a little more traditional
Hitty-ish. For the sake of simplicity and ease for those who don’t
carve you can just paint the big red feet black, but you will have to
sand them down some for acrylic paint to adhere to the feet. The varnish
and red paint used on these dolls is too finished and shiny to just
easily paint over without roughing up the surface first.
Since we have now dragged out the paints, it is also time to paint Hitty’s hair and signature front curls if you made molded hair. Set Hitty aside while her hair dries and her feet and stockings also dry.
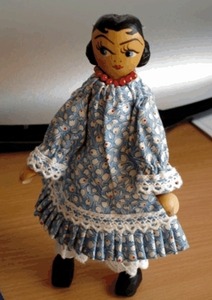
This doll is strung like the Raikes Hitty’s
with a piece of elastic held by a small wooden dowel in the arm &
leg holes. I did not remove the arms on my dolls, but if you did, please
use the same technique as on the legs.
I did note that Raikes dresses fit her nicely. If you left the original size feet on your new Hitty you will most likely need to make wider leg undies to get them over her larger than normal (for Hitty that is) feet, but Hitty will be pleased with whatever you make her ? I hope you had fun, and that we rescued some Polish wooden dolls from the scrap pile. Hittygirls*** For personal use only, do not copy or share this
tutorial with other groups, boards or clubs without written consent
from Melanie Smith melzdolz@aol.com Not to be sold or re-published without
permission. |